oh em ghee
RH: A part of me feels this post should be titled Confessions of a Former Raw Vegan. Years ago when I made the transition to a vegan diet, and then a raw vegan diet, there were only a couple of foods that I can honestly say I really craved. When going full vegan, most people will name cheese, eggs, and meats as foods they miss having in their diet, but for me there were only two things: butter and fish.
And what about raw fish? Raw, but not vegan. There were many loopholes that I considered.
Back to the point… Who doesn’t like butter? As a child, who hasn’t tiptoed to the dinner table while the adults were elsewhere to sneak a bite of butter from the whole stick? Of course you always blame it on the dog, except I didn’t have a dog – so that tactic never worked.
Since I am no longer vegan, butter isn’t off limits, but I do understand there are healthier ways to indulge my butter habit.
Just as delicious and twice as versatile and good for you, the answer is ghee.
What is ghee?
Ghee isn’t exactly a new health food craze – it is essentially clarified butter. You can usually buy it at your local health food store. It has been used for a very, very long time in the form of Ayurvedic medicine and as a culinary ingredient in Indian cuisine.
Simply enough, the process of gently heating butter melts away the lactose (milk sugar) and casein (protein) until all that remains is pure butterfat. That’s it! It is the process of removing the sugar and protein from the butter, which elevates ghee to one of the healthiest and most versatile fats used in cooking, medicinal practices, even beauty products.
Making your own ghee is much more cost effective than purchasing it in stores. Homemade ghee tastes much sweeter and, of course, is much fresher than commercially made ghee. Plus, by making it yourself, you can ensure the quality of the ingredients you put into it.
Why is ghee good for us?
Ghee is highly valued in Ayurvedic practices as a rejuvenative and is a superb aid for digestion and absorption of nutrients. It is an excellent source of Vitamin K2 and conjugated linoleic acid, or CLA, a fatty acid known to be protective against carcinogens as well as heart disease. It is prized for helping the body absorb fat-soluble nutrients such as vitamins A, D, E and K, along with other minerals. Ghee can also be used topically as a moisturizer for dry, cracked, or blistered skin.
It is particularly restorative to Vata and Pitta doshas. Kaphas may also benefit from a small amount in their diet, but are advised to use it sparingly since it can be too heavy, warming, and grounding for the Kapha constitution, which benefits from lighter oils and lower-fat diets.
Perhaps the best quality that ghee has to offer, aside from being incredibly tasty and nutritious, is it’s very high smoke point which makes it an ideal medium for baking, sautéing, or even frying. Ghee has a smoke point of 480 degrees Fahrenheit; this is much higher than butter, which can smoke and burn due to the casein and lactose it contains. By removing these components from the butter, the smoke point of the butterfat rises, making ghee much more versatile and a healthier fat to cook with.
Although it is not vegan, because ghee has had the milk sugar and protein removed from it, those who have sensitivities to dairy products can typically benefit from the addition of ghee in their diet without any adverse reactions.
How to Make Your Own Ghee
Equipment Needed:
One medium saucepan
One wide-mouth Mason jar (pint or quart sized), plus lid Cheesecloth
Ingredients:
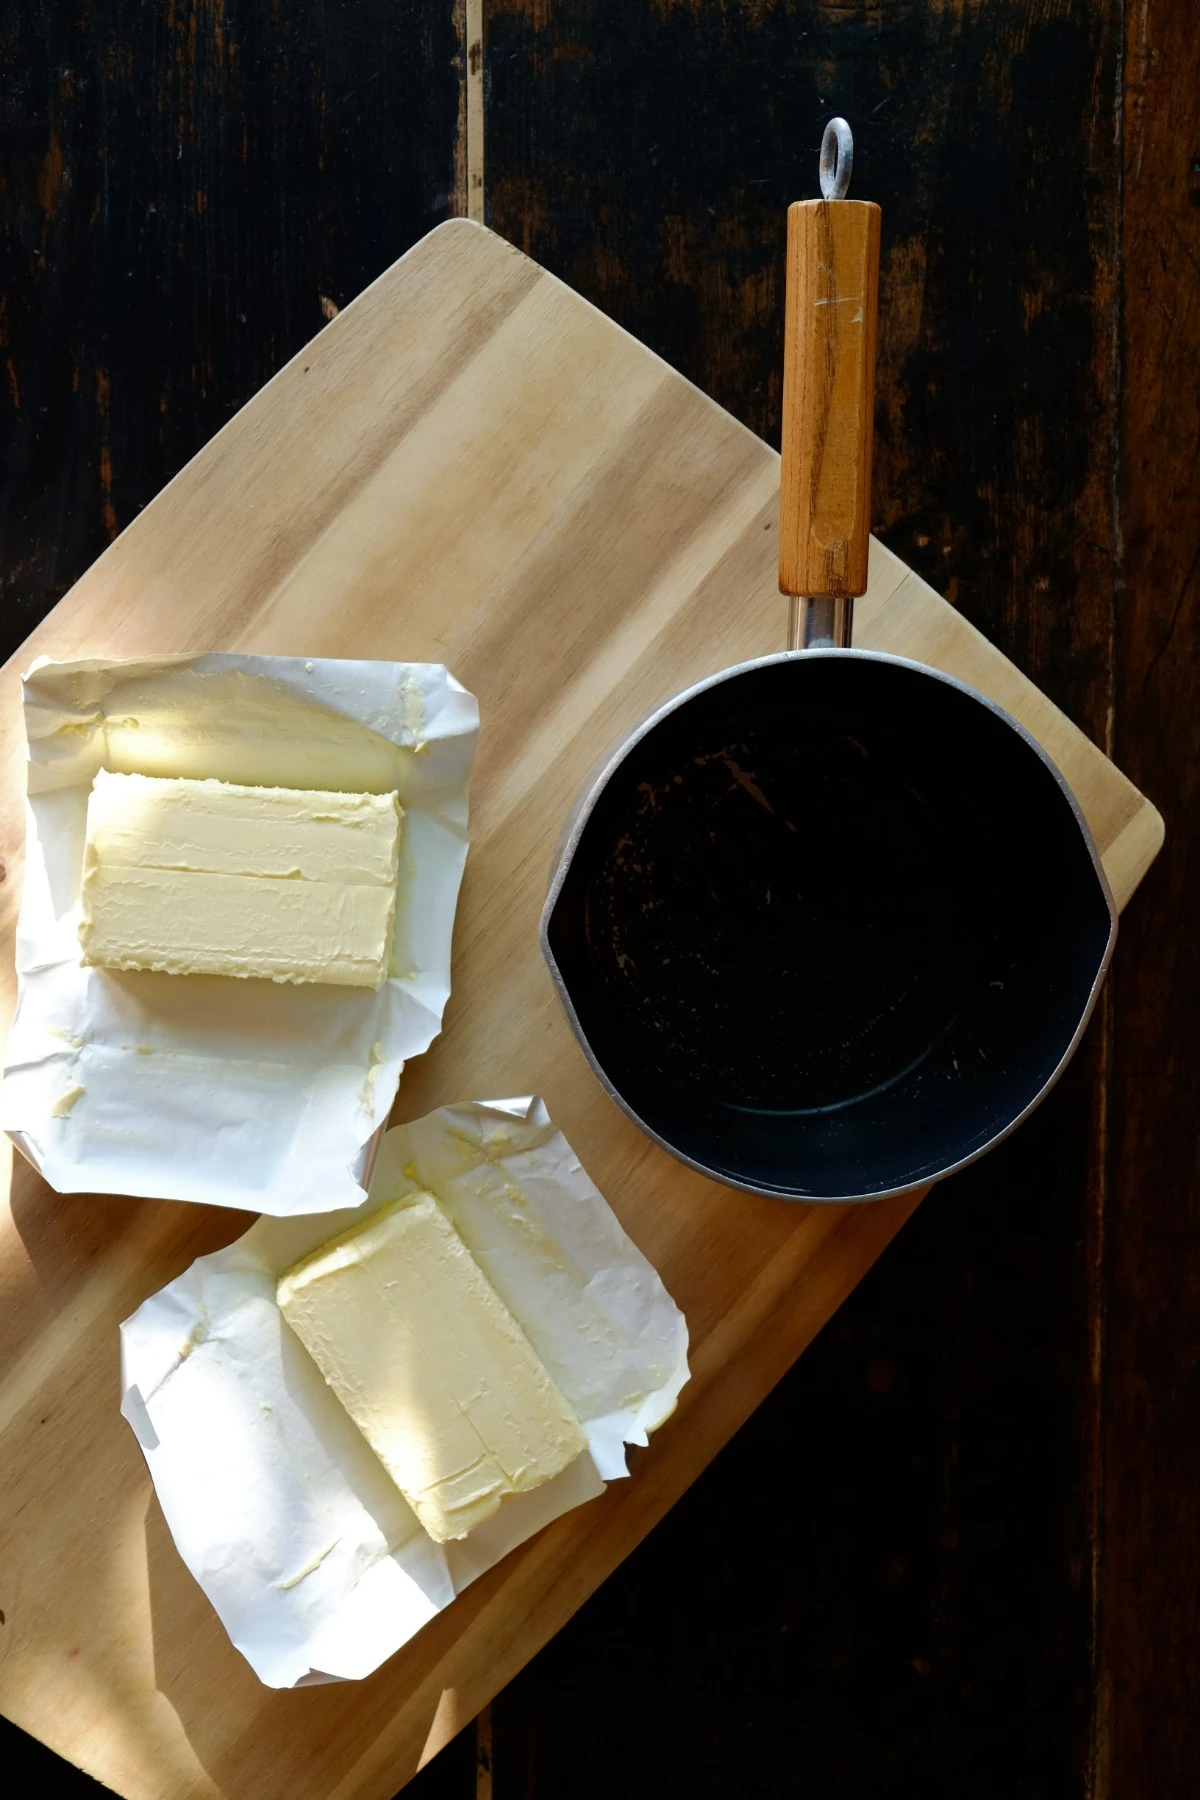
One pound (approximately 4 sticks) unsalted butter, organic and grass-fed
*This amount will yield approximately 1 pint (16 fluid ounces) of ghee
Steps:
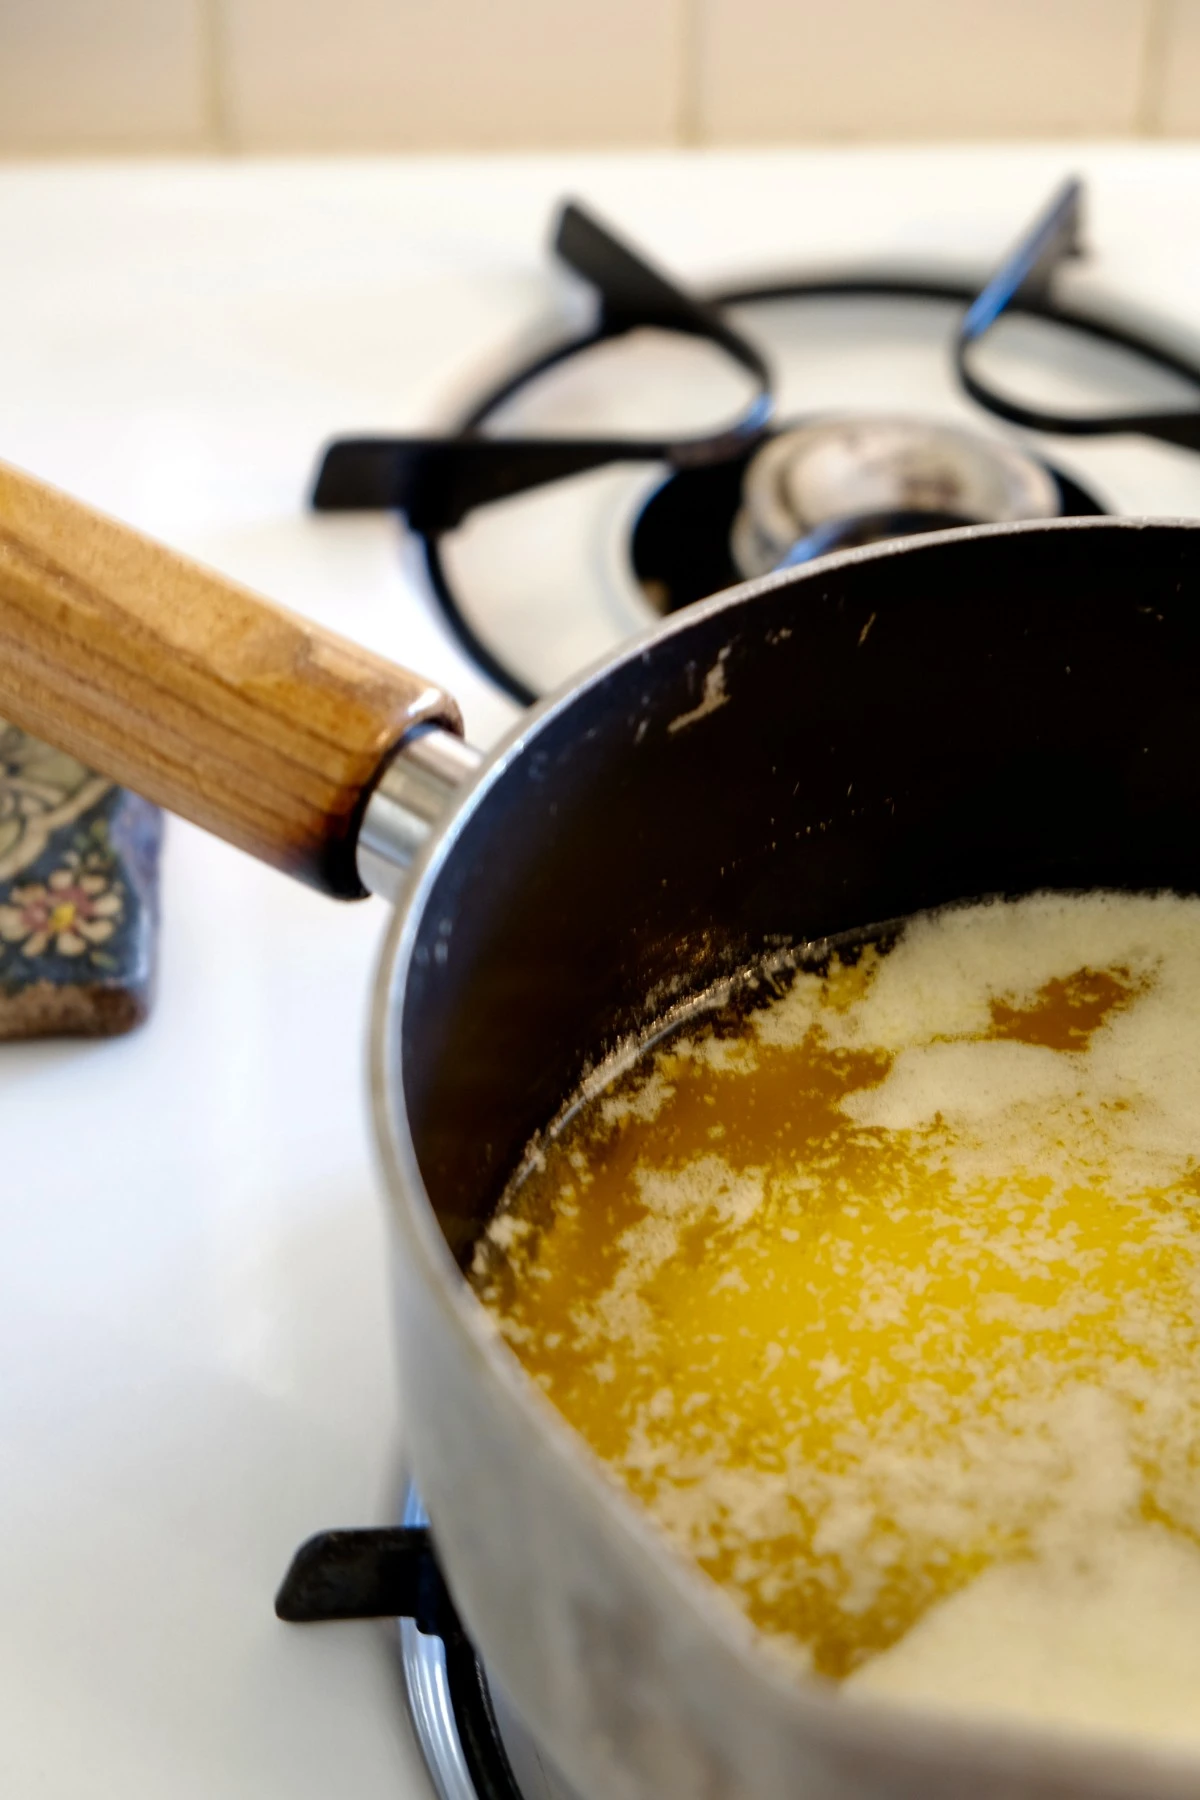
1. Heat the butter in a saucepan over medium-low heat, without stirring, until completely melted and the milk fats separate and fall to the bottom of the pan. The butter should simmer gently as foam rises to the top and may splatter a bit, so be careful!
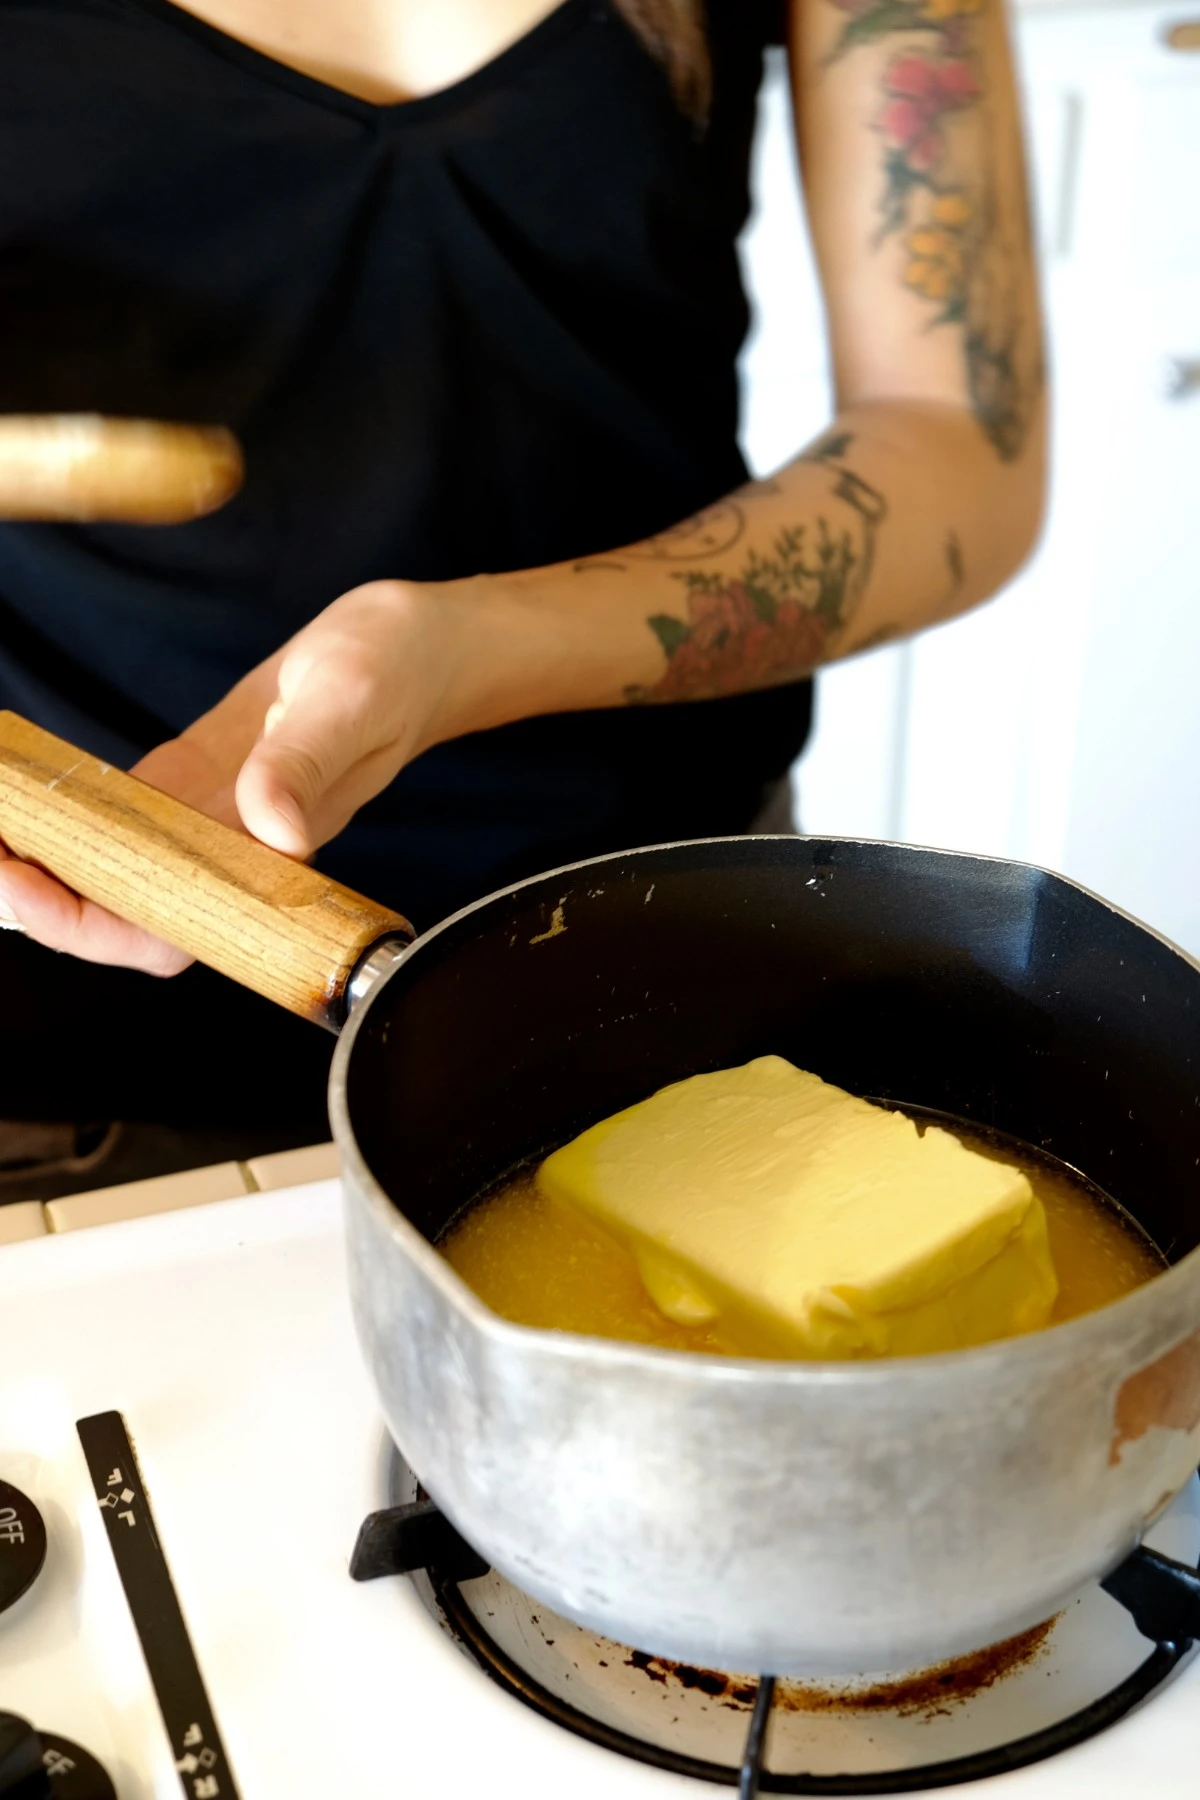
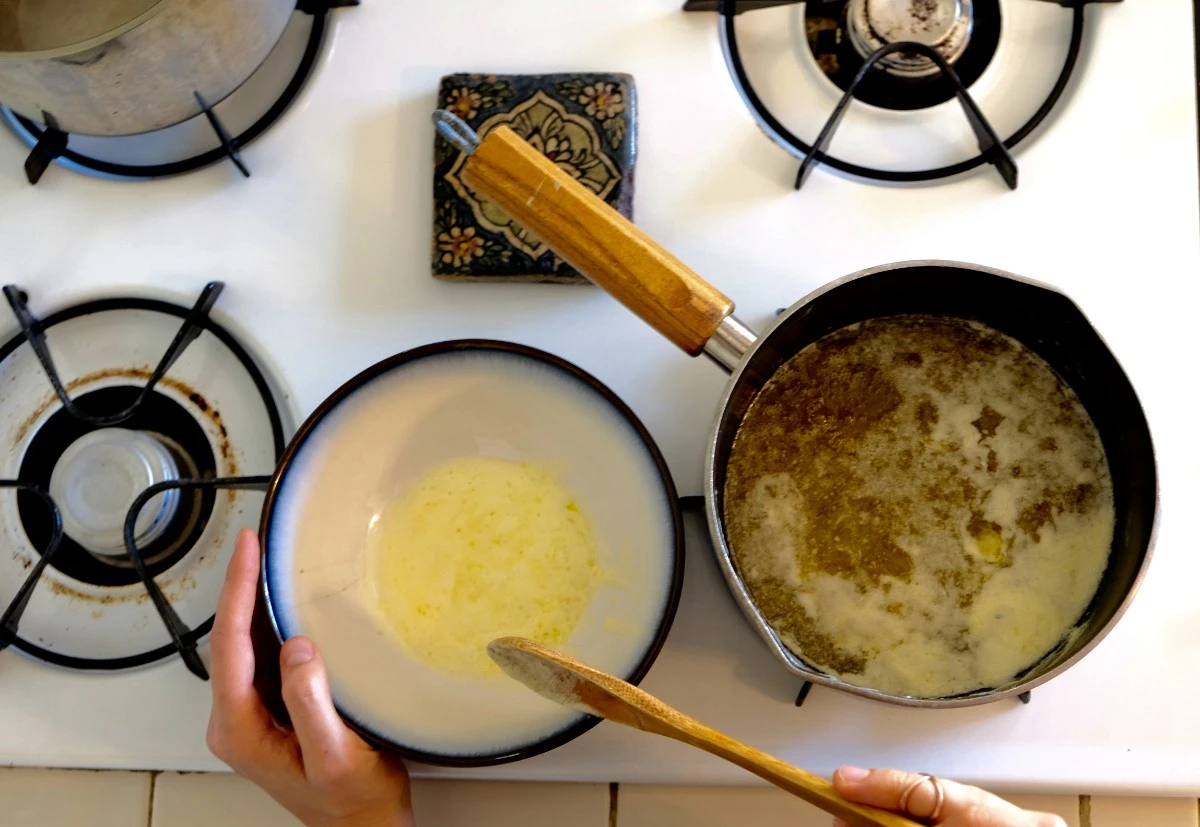
2. This process should take about 25-30 minutes depending on the amount of water in the butter. The butter will separate into 3 layers: a foamy top layer, the golden butterfat layer, and the milk solids on the bottom. The goal of this process is to collect the liquid butterfat layer in the middle, and discard the other layers. Carefully skim off the top layer of foam using a spoon. Do this gently to avoid mixing the foam back into the butterfat while removing as much of the foam as possible.
3. When the separation process is completed, the butter should no longer be splattering and no more foam will be collecting on the surface of the butter. At this point your kitchen should smell pretty darn amazing, like a classic French bakery with a handsome Parisian gentleman selling pastries… but I digress. The aroma should smell rich and buttery and the milk solids on the bottom of the pan should have turned a golden brown color. At this point remove the saucepan from the heat to prevent the ghee from burning.
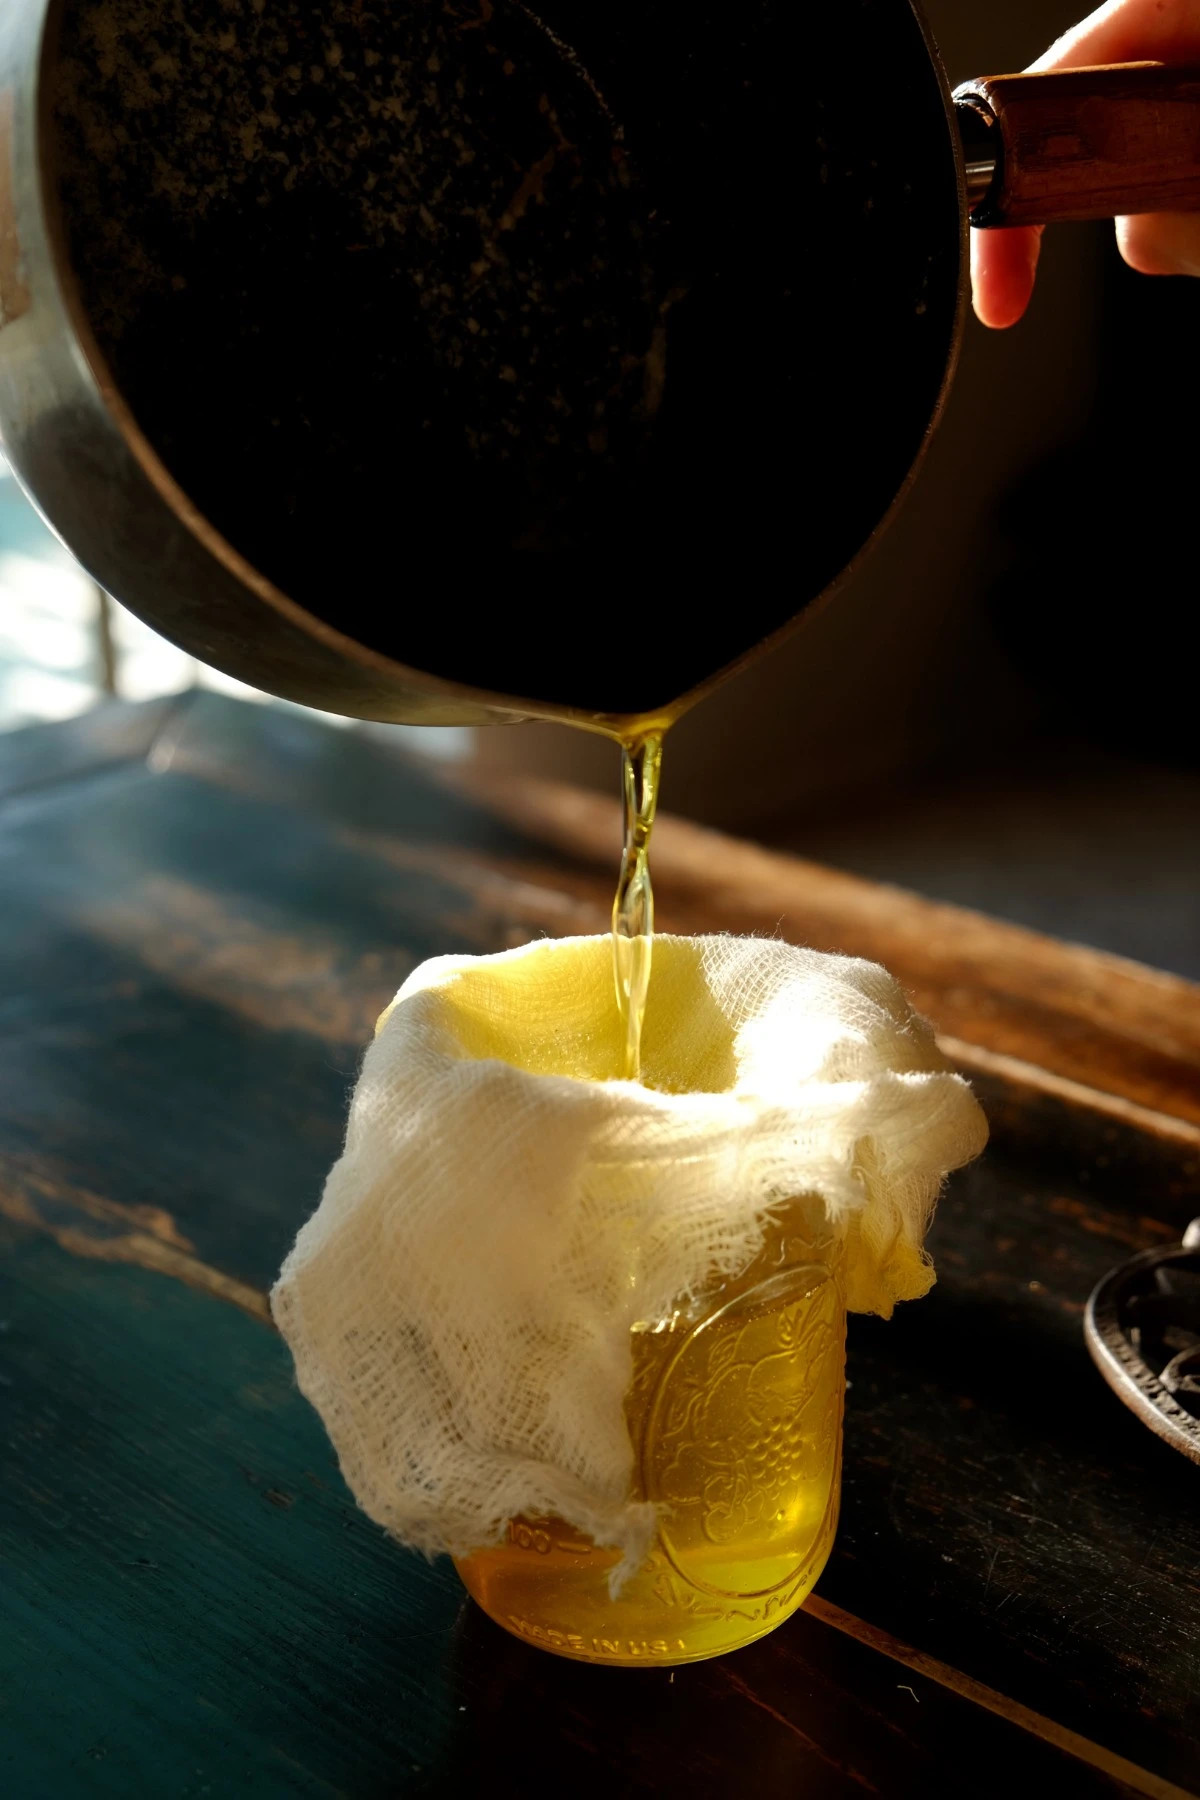
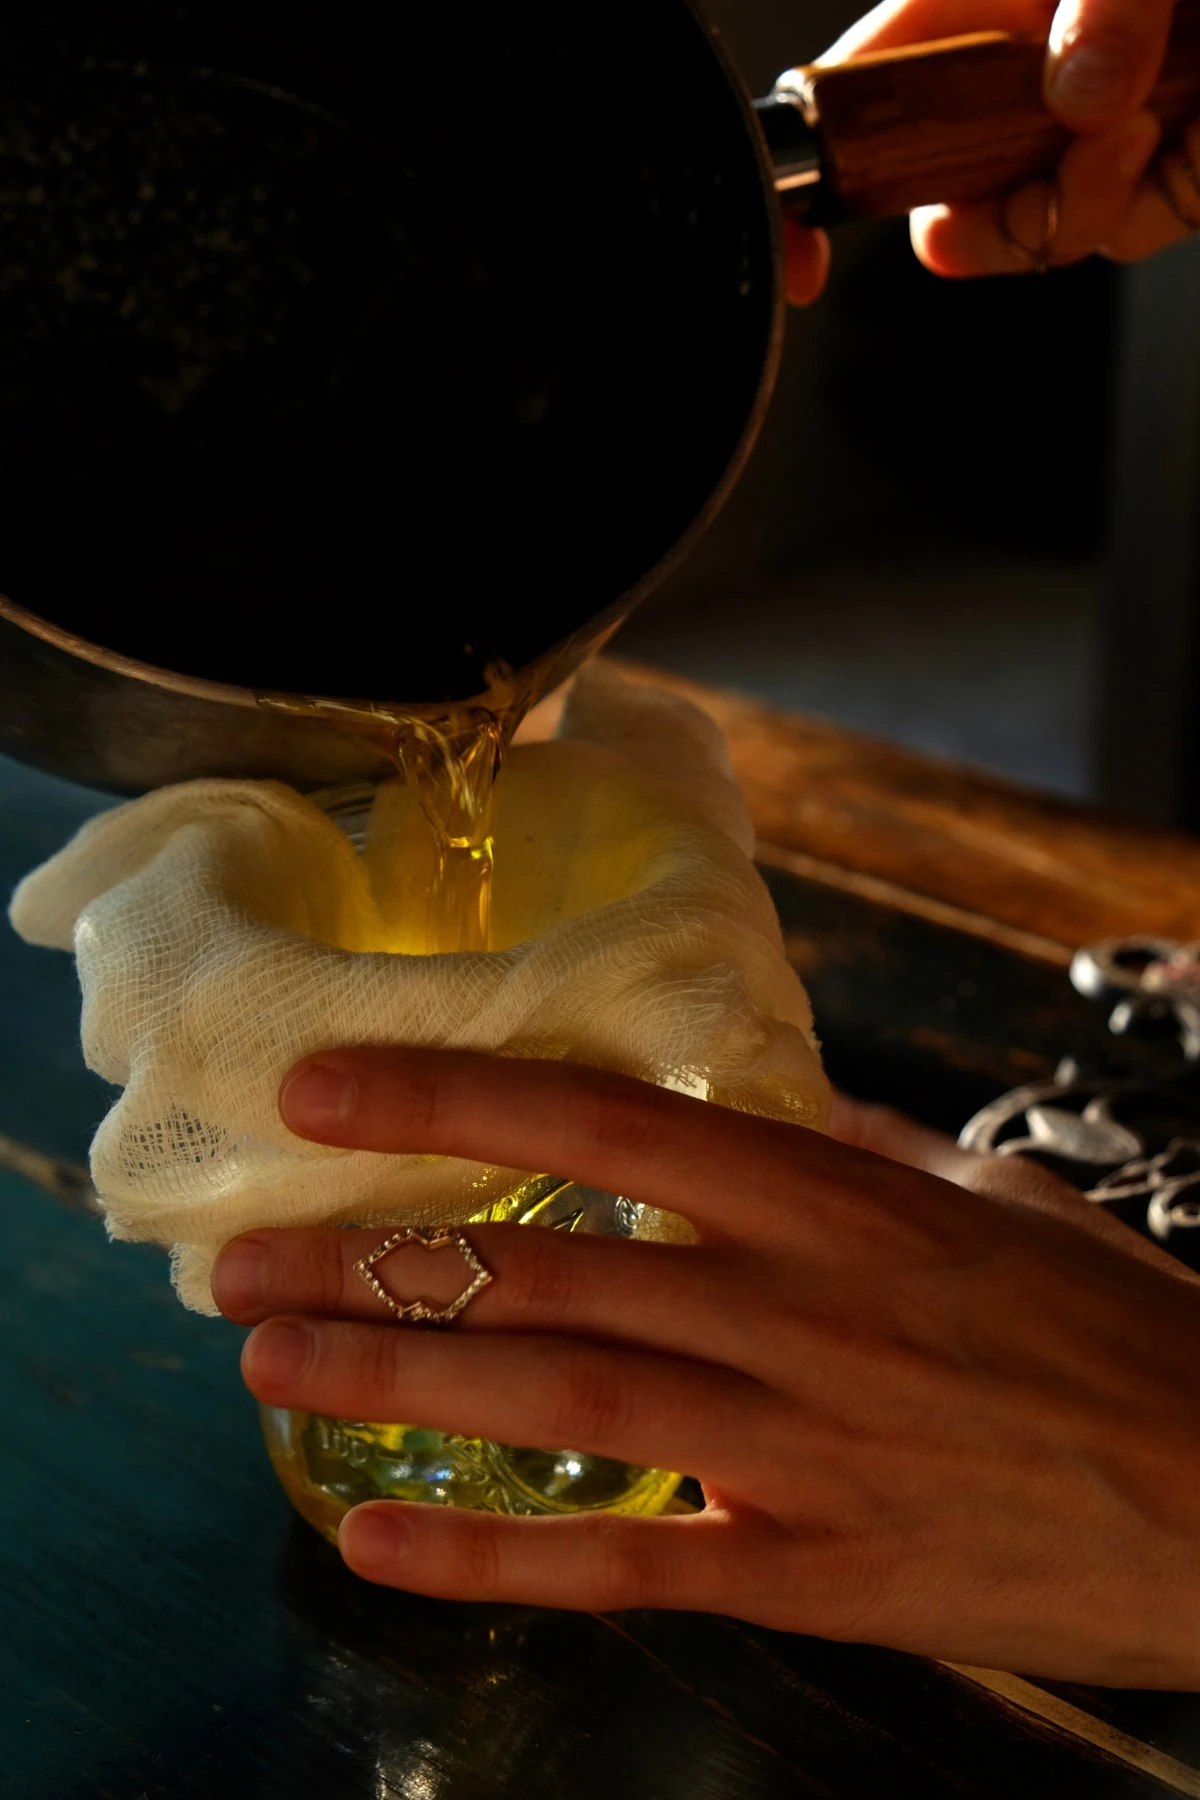
4. Fold a couple of layers of cheesecloth over the opening of the Mason jar to catch the solids. Carefully pour the liquid ghee through the cloth into the jar. Leave behind as much of the milk fat solids as possible while draining off all of the liquid butterfat. The cheesecloth is there to strain away any leftover foam or solids that get away. Discard the remaining solids in the trash. Just like bacon grease, it will damage your sink pipes if poured down the drain.
5. Allow the ghee to cool to room temperature before covering it with a lid. The ghee will solidify just like butter; store in the refrigerator for up to one year, or at room temperature for up to 2 months.
Whipped Ghee and Chamomile Honey Recipe
Ingredients:
1/4 cup raw honey, clover or orange blossom is good for this recipe
1 tablespoon organic whole chamomile blossoms
1/2 cup ghee, room temperature
Pinch of Himalayan or sea salt
Steps:
1. Allow the honey to soften at room temperature. Raw honeys come in differing textures, from a thin liquid to a thick paste. If it is still too solid, set the honey in a warm spot like a sunny windowsill or on top of a low temperature oven until it is softened.
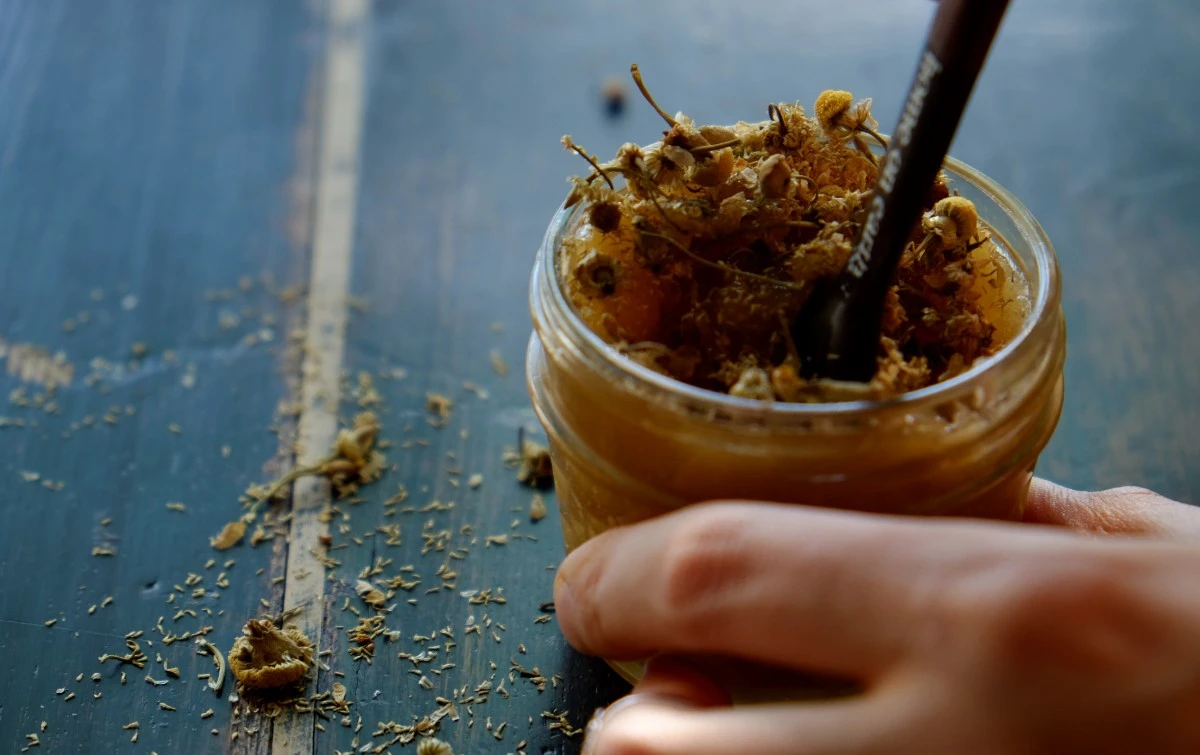
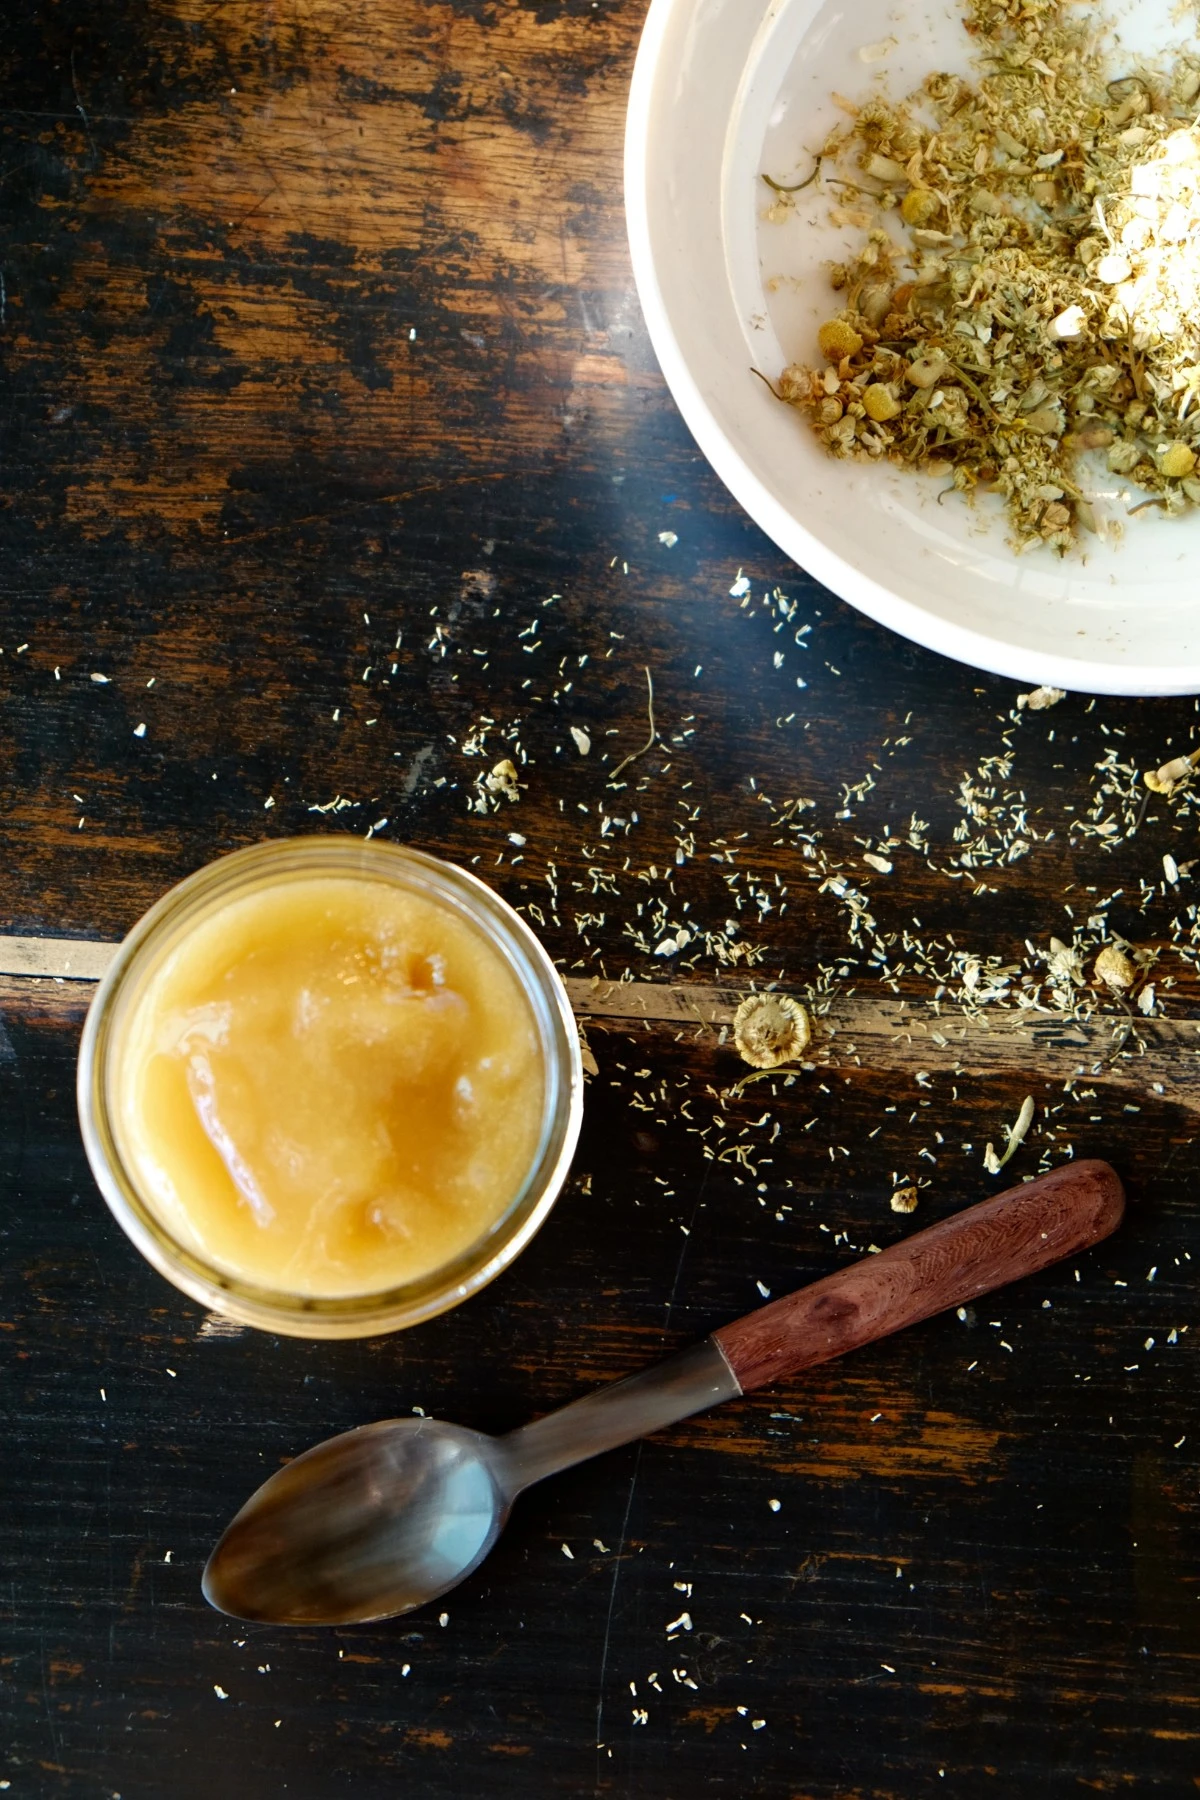
2. Combine the softened honey and chamomile blossoms in a small bowl, cover and let sit at room temperature for 24 hours.
3. After one day the honey will be infused with the flavor of the chamomile. At this point it is ready to add to the ghee. The blossoms may be removed from the honey or left in the honey for a stronger flavor profile in the whipped ghee. If leaving the blossoms in the honey, we suggest using a blender to break down the blossoms before adding the infused honey to the ghee.
4. To whip the honey, use a medium bowl and a hand mixer or a food processor. Whip the honey for 1 minute until it becomes lighter and fluffier in color and texture. Add the softened ghee and pinch of salt and continue to whip the ingredients for another 30 seconds to a minute until everything is homogenized, light, and fluffy.
5. This recipe is extremely shelf stable, but the addition of the chamomile blossoms may cause the mixture to spoil faster if left at room temperature. Transfer to an airtight container and store in the refrigerator to prolong the shelf life. Serve on toast, with our Persimmon Scones, or maybe just by the spoonful.